Everything You Need to Know About Tie Dying Your Hair


When we think about tie-dye, we’re usually picturing images of funky, multi-colored tees and 70’s style flares, right? Well not anymore! In case you hadn’t heard, tie-dying your hair is now a thing.
But what does it look like? How does it work? Will it suit just anybody? We’re about to answer all of those questions and more. And, bonus, those days you spent in lockdown learning how to perfect the technique on your clothes might not have been a waste of time after all!
What is Tie Dye Hair?
This psychedelic hair trend has actually been around for a few years now but we’re starting to see it crop up more and more of late. Perhaps it’s the want to try something new after a year spent indoors that has us reaching for the dye. Or maybe, people are just starting to realize what a fun and seriously unique look this actually is! Either way, here at Evalectric, we love it, and think you will too.
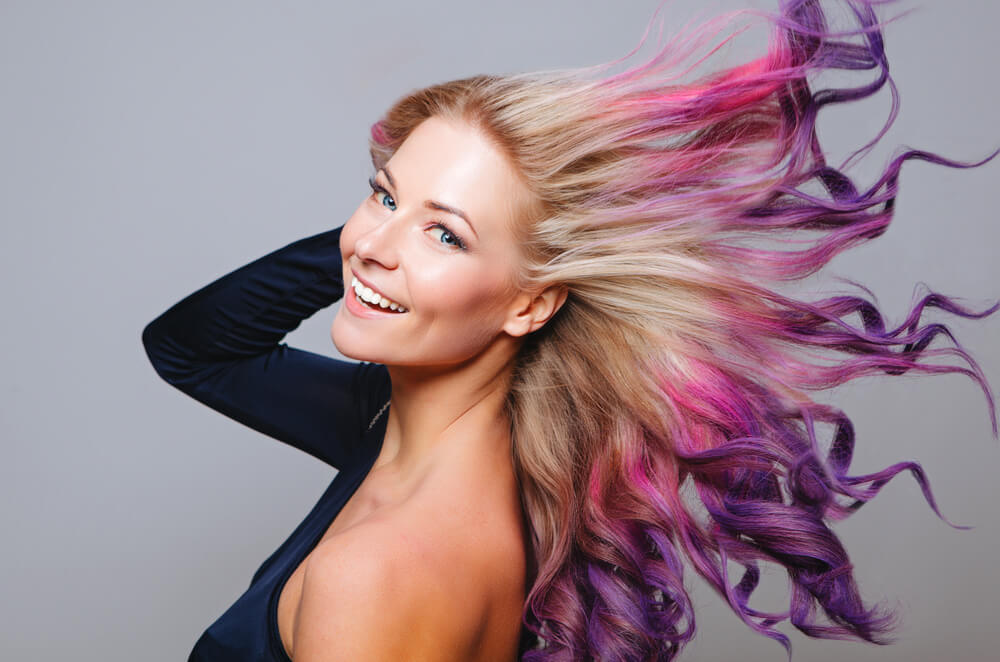
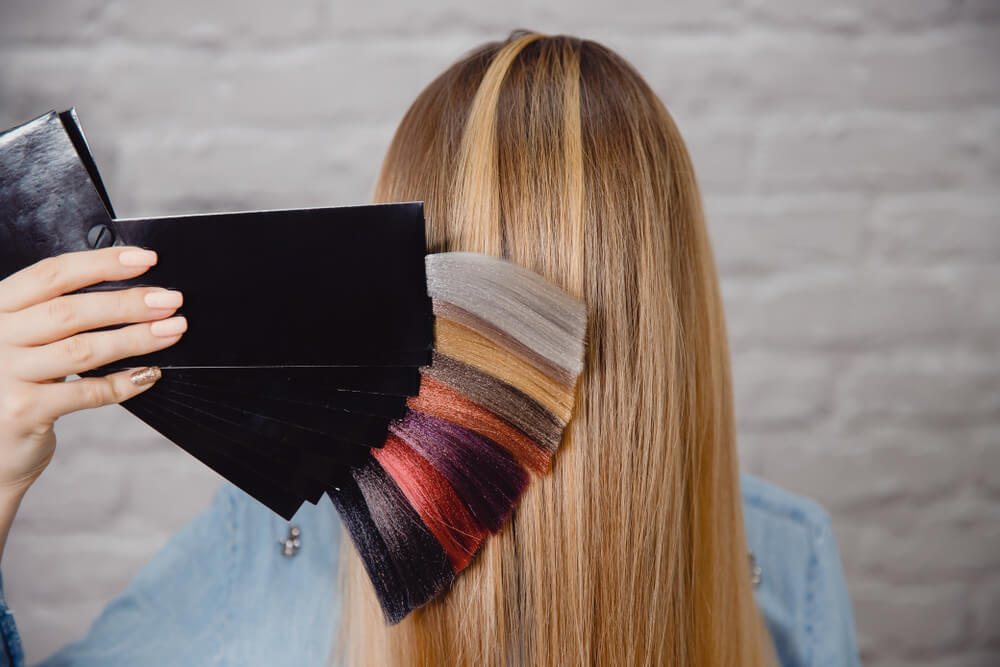
In terms of how the color actually looks on your hair, it really is pretty similar to the tie-dye pattern you’d usually see on clothing items. Multiple colors run throughout the hair creating a tie-dye effect quite unlike any other hair dye technique we’ve ever seen.
One of the best parts about the process is, your colors are fully customizable. If you want to go for ten different colors you can, if you’d rather stick to just a few that’s great too!
We love the multi-dimensional shapes this dye look creates and would suggest using at least three colors to get that quintessential tie-dye result.
Whilst just two colors will work, you may find you end up with something that resembles more of an ombre or dip-dye look that way.
Always Start with Healthy Hair
Before you consider tie-dyeing your hair, it’s important to make sure that your hair looks as healthy as possible. Dehydrated hair is never a good look, even when dyed, so make sure that you’re using a gentle yet decadent shampoo, such as the Evalectric Moisturizing Shampoo. Pair this with the Evalectric Moisturizing Conditioner for even better results.
A hair mask is another must for glossy-looking locks. Look for a formula that’s rich in argan oil and panthenol – these are two of the best ingredients out there for your hair. You’ll find them both in the Hair Mask from Evalectric.
When it comes to styling your hair, make sure that the products that you use are gentle enough for colored hair. Anything too harsh will cause all of that tie-dying work to fade faster than it should. Styling sprays are always good to have to hand – look into the Evalectric Hair Styling Spray if you need a new go-to. Hair serums can also make a huge difference, not only when styling, but also to the overall appearance of your hair. We’ve seen great results with the Hair Serum from Evalectric!
Can You Tie-Dye Short Hair?
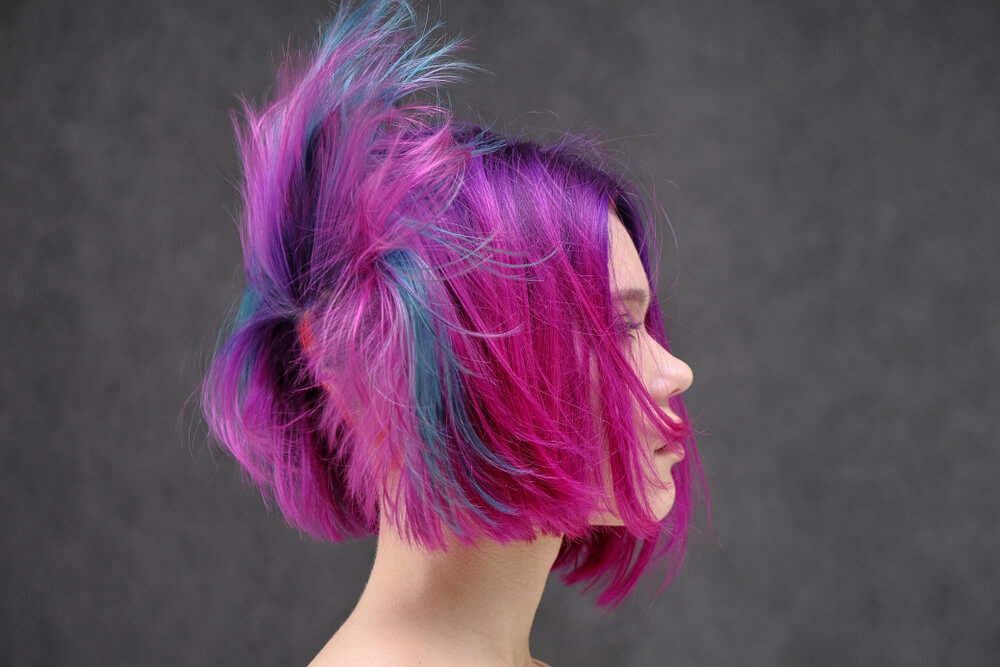
Absolutely! Though you may need to alter your technique with shorter hair (by brushing the color directly on without sectioning with fabric), tie-dye hair is still totally achievable with shorter lengths.
In fact, if you have shorter hair, this is a look we’d highly recommend!
Why?
Let us explain…
There’s no denying that tie-dye hair looks amazing on longer lengths. You can easily use multiple colors throughout your tresses, you can experiment with a range of shapes and dye techniques, and the end result is certainly something of a wow moment!
When it comes to shorter hair, the look is different, sure. But, we adore how fresh and instantly cool tie-dye looks on these short and shapely styles!
It’ll give your hair a seriously unique appeal that we especially love for spring and summer. What’s more, if you choose shades that compliment the colors you know you wear more in warmer weather, you’re always guaranteed to look perfectly put together!
Can You Tie Dye Select Sections of Your Hair?
Hoping this style is super versatile?
You’re in luck!
The beauty of tie-dye hair is that you can choose to section out the pieces you want to dye however you want. Though we’ll go into more detail about a more traditional way to tie-dye your locks later, you can really have fun with this look if you’re willing to play around with it.
Opt to tie-dye just the ends or go for a cool layered look where you leave the top section out and only apply color underneath. You could even choose just one small section of your hair to tie-dye. It’s totally up to you to make this style as unique as you like.
How Do You Tie-Dye Hair?
If you can believe it, tie-dying your hair is actually very similar to tie-dying clothing and other fabrics. It can be quite experimental and you’ll need to be prepared for a possibly unexpected outcome in terms of exactly where the colors sit when the dyeing is complete.
For this reason, many of us will only want to book in for a salon appointment to get the job done. That’s totally understandable and absolutely the right way to go if you feel it’s right for you (or if you totally don’t trust yourself not to accidentally decorate your bathroom with a rainbow of hair dyes!).
However, if you feel you’re up to the challenge yourself and want to have a little fun with your hair, we’re here for you. We’ve put together a handy guide to help you understand how the process works and how you can do it for yourself at home!
Want to know the step-by-step process?
Keep on reading!
What You’ll Need To Do
Now, before we get ahead of ourselves and start flinging colored dye all over our locks in excitement, let’s check off everything you’ll need to do, and purchase, to successfully and safely complete this look at home.
Gather Your Supplies
Before you do anything else, collect together all of the things you’ll need to actually tie-dye your hair.
First on the list?
Dye of course!
Purchasing Your Hair Dye
Yes, this is the fun part. The part where you get to decide just how wild you’re feeling and how bright your want to make your hair by the end of this, shall we say, experiment?
As we said before, we suggest using at least three colored dyes when tie-dying your hair. This will give the most authentic finish considering the majority of tie-dye patterns out there usually have a large range of colors in them.
If you want to go for more than three, we totally support that! Think about it, you’re already about to paint multiple colors on your tresses, if you’re going to go for it, why not really go for it!
Make a plan of how you want your finished look to be. Save some images, even make a mood board of the different colors you like. This way you can be sure they really work together.
If you’re feeling only one color really takes your fancy, why not go for multiple shades in the same color family? Something like pastel pink, bubblegum pink, and fuchsia could be great!
The options here really are endless so give yourself time to settle on a palette that you really love before parting with your hard-earned cash. It’s unlikely you’ll be able to return the dye once purchased.
Consider Which Dye You’ll Need For Your Hair Color
Those with blond or very light brown hair should be able to apply dye straight onto their locks and receive good color coverage. Those with darker hair, unfortunately, won’t always see the brightest results.
To get to the shade you need, you may be looking at lightening those locks before you can get started. If you feel this is something you’re able to take on at home or if you’ve done it before, great. If not, we highly suggest booking a salon appointment to get to the shade you need.
Lightening your hair is no mean feat, especially when bleach is involved so don’t dive into that process alone unless you’re absolutely certain you know what you’re doing!
Permanent Or Semi-Permanent?
Once you’re ready to purchase your dye, the choice between permanent and semi-permanent is up to you. If you think this is a look you’ll want to keep for a long time to come, go for permanent. If you simply want to have some fun with your hair by trying this look temporarily, choose semi-permanent dyes.
We will say that semi-permanent is a great way to go if you’re not 100% confident. It means the color will be in your hair for a lot less time. It also means it’ll be easier to remove should things not turn out quite as you hoped or, on a more positive note, because you loved it so much you can’t wait to try out more colors!
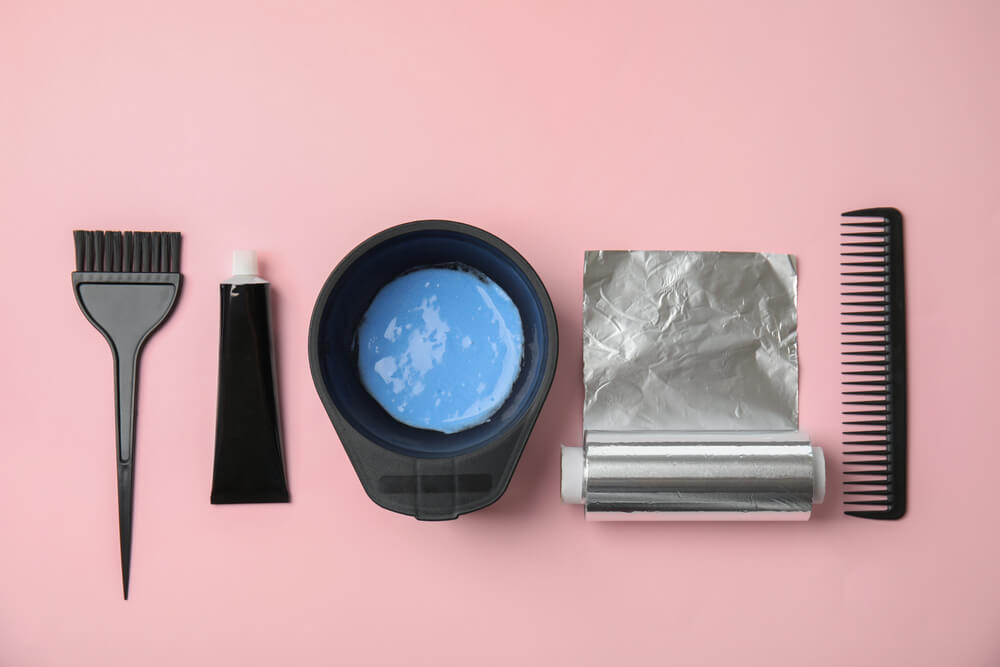
Purchase Your Tools
To make the dying process a lot easier for yourself, we suggest getting your hands on some hair color bowls and brushes for easy and neat application. We actually found some amazing color codes ones that not only look super cute but will also help you see which shade you’re reaching for when you’re deep into the dying process!
You’ll also need hair dye gloves. These will protect your hands from color transfer and will make the application a lot smoother if you do need to apply to any areas that your color brush can’t reach.
Other things you’ll need are a comb to brush out your locks before you start, plus a hairdressers’ cape (or an old towel you don’t mind staining) to go around your shoulders. This will protect your clothes, your skin, and the floor!
Finally, gather plenty of no-snag hair bands and enough fabric to tie off the sections of hair you’ll be dying. Make sure it’s a fabric you don’t mind cutting up and getting color on. This will be the main way you section out your hair as you apply the color.
Prepare the Area
No matter where you live, it’s unlikely you want to end up with stained carpets and walls that can’t be quickly wiped clean in the event of dye getting transferred onto them. For that reason, we highly recommend setting yourself up in the bathroom or kitchen. This way you’ll be surrounded by easy-to-wipe surfaces, walls, and floors that won’t be destroyed by dye.
Now, pop that cape (or towel) around your shoulders, it’s time to begin!
Tie Dyeing Your Hair

Check Your Dye
Whilst some dyes are best applied to wet hair, others direct you to use them on dry hair. Check your dye and wet/don’t wet your hair accordingly.
Comb Out Your Hair
The last thing we want is tangled hair when trying to apply color! Make sure yours is properly combed through and tangle-free so your dye can absorb easily into the strands.
Section Off Your Hair
Now, this may be the part that matters most! By sectioning and tying off pieces of hair, we’re deciding which bits will and won’t be dyed. For an even, all-over tie-dyed effect, we suggest sectioning the hair into evenly spaced square blocks. Then, using no-snag bands, tie up each section at the top, and secure more bands evenly spaced throughout each section (roughly 3 inches apart depending on the length of your hair). These should resemble the first stages of bubble ponytails.
Make each section is as wide as it is deep, we suggest 2-3 inches. This is also the point where you can decide whether you’ll color all of your hair or just a part of it. If you’re going only for the ends for example, simply section out your hair and tie each of your first bands lower.
If you don’t want the piecey look this technique will create, you can always make bigger sections and opt for a more powerful allover color!
Grab Your Fabric
Get your ready-cut sections of fabric. Make sure they’re long enough to tie around each of the no-snag bands and wide enough to block the amount of space you don’t want to be dyed. If you’re not sure, we’d say roughly 1 inch high is a good amount of space to leave un-dyed. Cover all of your bands with a piece of cloth and it’s time for the fun part!
Get Painting!
With your dyes mixed and ready in their bowls, you can start to paint them onto the hair! The best technique here is to fade your colors into one another like a rainbow. Or, if you’re using multiple shades of the same color, start with the most vibrant at the top and fade into the softest one on the ends.
Use two colors on each section and blend them with your brush in the middle. This will give that warped, psychedelic 70’s look we’re aiming for once the bands and fabric pieces are removed.
Let it Absorb, Then Remove Your Bands and Cloth
Once you’ve covered every section you wanted to dye, let the dye absorb for the recommended amount of time on your color box.
Then, carefully remove the bands and cloth from your hair. Be careful here not to smudge the color into the formerly cover sections.
Even if this does happen, don’t panic! We’re not looking for super clean lines with this style and you’re about to rinse the color out anyway. Therefore it won’t have enough time to develop and spoil your look.
Rinse & Condition Your Hair
Once the dye is rinsed out, go ahead and use a great color protection conditioner to add a look of shine and vibrancy to your newly died hair! Style it as you wish, using the Evalectric Hair Styling Spray for some extra hold, and you’re all set!
Beautiful, vibrant, and uniquely dyed hair is easier to achieve than you think. And once you try this look, we’re betting you’ll never want to go back to standard hair colors again!