6 Romantic Hairstyles for Curly Hair
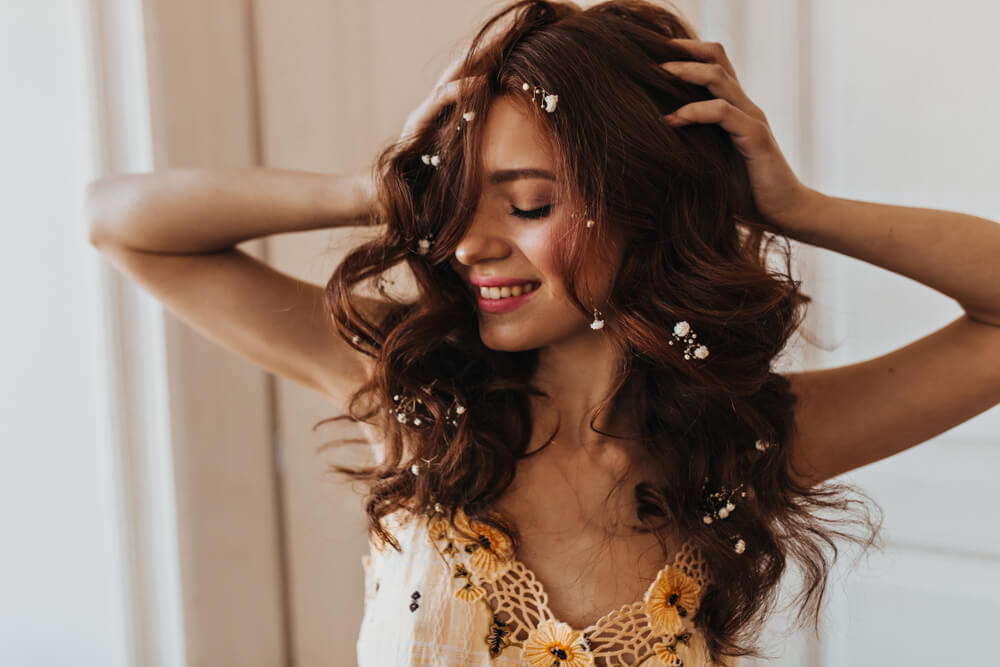
When it comes to curls and romantic hairstyles, the two truly go hand in hand. The perfect pairing whether you’re relaxing with your loved one at home, heading out for date night, or even about to walk down the aisle. And, if you’re looking for the prettiest romantic hairstyles for curly hair out there, you’ve come to the right place! Keep scrolling and be prepared to fall head over heels for every suggestion on Evalectric’s list.
Soft Curls & Mixed Braids
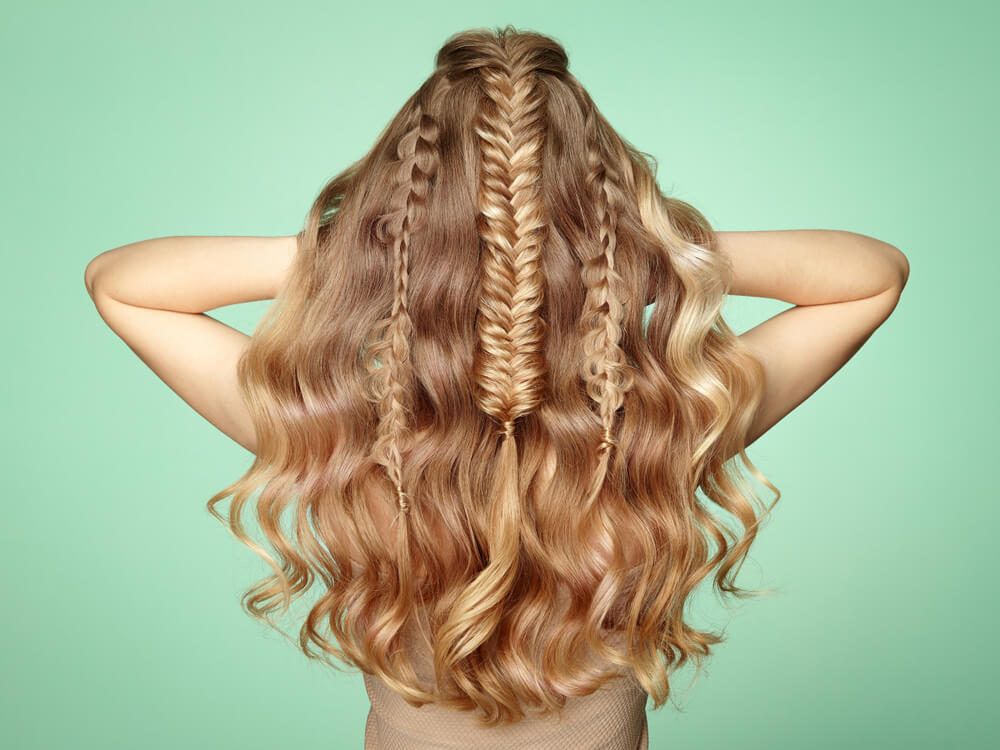
What’s better than one braid? Three braids! Especially when you have curly hair. This stunning braided look is one of our favorite ever romantic hairstyles. Not only is it pretty simple to create once you get the hang of each braid style, but it’s also one you can wear for so many occasions, from bridal showers and brunch catch-ups to date nights and weddings!
How to Create Soft Curls and Mixed Braids
- If you’re starting with naturally curly, or pre-curled hair, you’re already halfway there! If not, go ahead and curl at least the bottom two-thirds of your locks so the style looks complete once the braids are in. Our advice? Use the Evalectric 25-18 curling wand to create your curly tresses. It’s made with Teflon barrels to diminish the look of damage and its high heat settings mean your curls will last for days if you need them to. What’s more, the larger barrel is perfect for achieving larger, more romantic-looking curls that perfectly compliment both the smaller and larger braids in this style for a wistful, romantic finish.
- Once your hair is curled, we like to add a couple of pumps of the Evalectric hair serum to our lengths. Its non-greasy formula leaves your hair feeling super-soft and looking seriously shiny. It also helps to seal the look of split ends and reduces the appearance of flyaways. Ideal for a hairstyle that involves most of the hair remaining down and loose!
- Next, you can go ahead and start dividing out the three sections for the braids at the top. Begin with a much larger section that starts at the front of your hair and works back in line with your temples. Next, two smaller sections at either side just behind. Secure the smaller pieces away for now.
- Take the middle section and braid it into a simple fishtail braid. This basically means you’ll divide this section into two and take it in turns to pass fine sections of each (around a centimeter thick) over to the other side, and repeat. Once you reach the bottom of the section, use a clear elastic to secure it in place
- Now, use a three-strand braid technique to braid the other two sections one at a time. Secure each with a clear elastic to keep all of the focus on your braids and curls!
- Finally, go ahead and gently loosen each braid with your fingertips, pulling gently on each section to give it a more lived-in vibe!
A Wrapped Low Curly Ponytail (With or Without Flowers!)
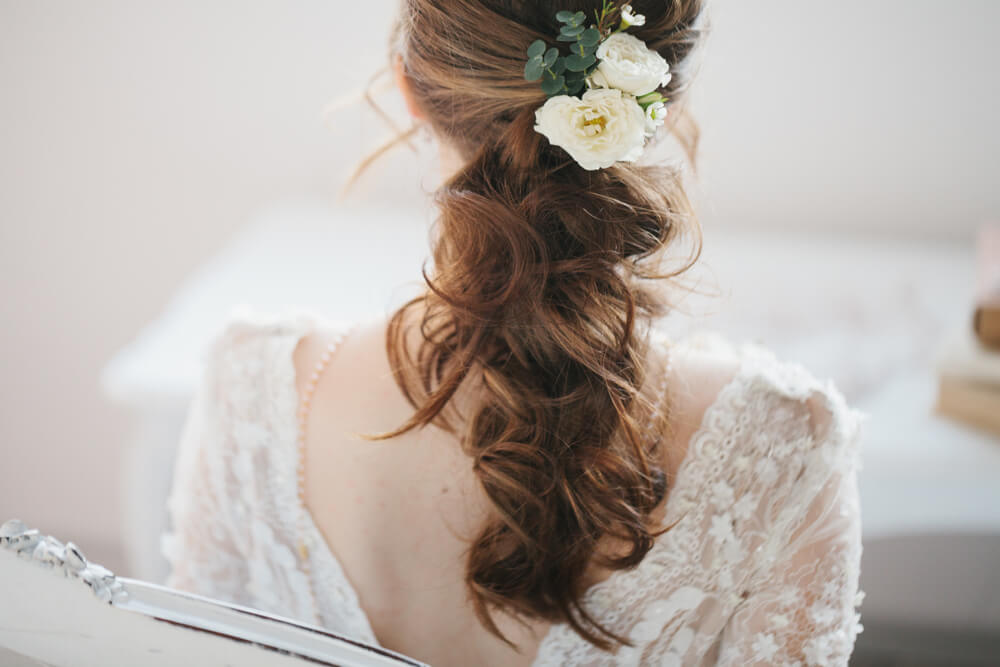
With the addition of a few simple flowers, the next of our romantic hairstyles is made for blushing brides. It would also be a great option for bridesmaids as it works for long or shorter hair! If you decide not to opt for flowers, this style can work for pretty much any occasion, including birthday celebrations or dinner with friends and family.
How to Create a Wrapped, Low Curly Ponytail
- Once again, we’ll go ahead and assume you’re starting your styling journey with curls already in place. If not? Make sure your tresses are looking their bouncy best with a little help from the Evalectric 25/33mm Venti curler. It’ll give you salon-quality curls at home that last from day to night and beyond. So good for celebration days like your wedding! Also, thanks to its extra-large tapered barrel it’ll take just minutes to have all your hair curled and looking super shiny and healthy.
- Start by sectioning off the front two pieces of your hair from the hairline to just in front of your ear. Secure these away for now, we’re coming back to them!
- Next, work on the back part that you left down. You can smooth your curls and keep your look very slick and neat if you like. However, we suggest letting your curls naturally shine through with romantic hairstyles like this. So, loosely gather the rest of your hair and use a clear elastic to tie it into a ponytail at the nape of your neck, or just an inch or two higher.
- Coming back to those two front sections. You can either leave them as they are, or braid them if you prefer (we certainly do!) and secure them at the ends with a clear elastic. Once you’ve done that, pull both sections back loosely. Tie them together just a few inches from the end.
- Twist these two pieces 180 degrees so you create a loop in the middle. Now, simply pull your ponytail from before through that loop. Pull the two sections underneath to tighten and hold the hair in place.
- Now loosen a couple of pieces at the front to frame your face, add a few spritzes of The New Evolution hair styling spray and you’re all set! Add a couple of flowers attached to bobby pins to transport this style from simply beautiful to seriously bridal!
Center Parted Curls & Plenty of Clips!
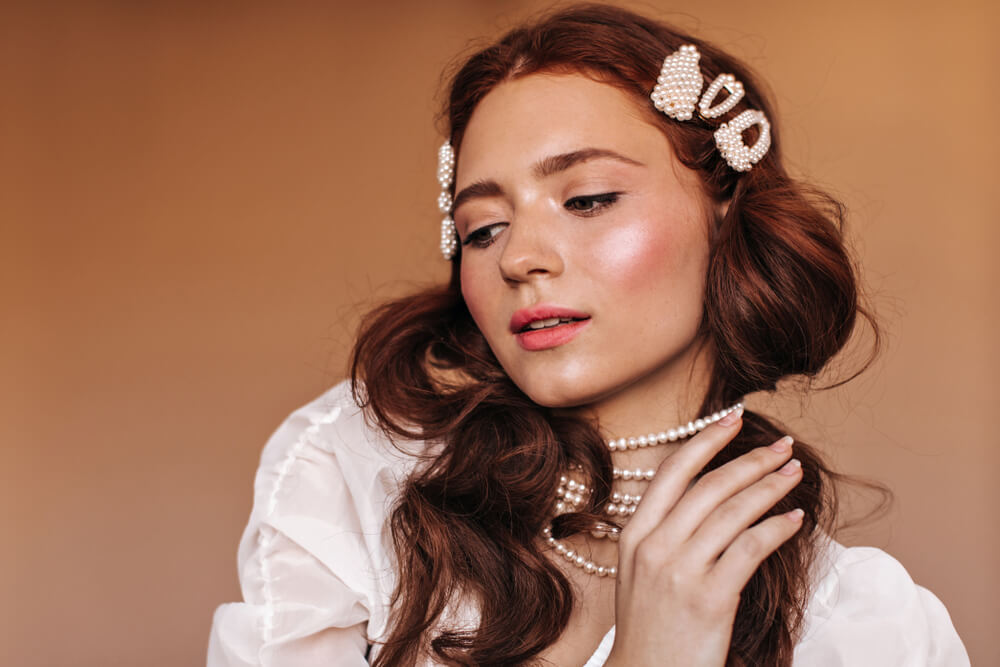
One of our favorite, last-minute romantic hairstyles?
Classic center-parted curls with the prettiest decorative clips!
This hairstyle is totally foolproof and eternally pretty. Not to mention, it works for pretty much every evening occasion and even on casual days if you choose the right accessories. All you’ll need is your gorgeous curls, a comb, and the hair clips of your choice (and we know you have plenty to choose from!).
How to Create Center Parted Curls With Plenty of Clips
- To begin, make sure your hair is freshly washed and conditioned. This will ensure that your locks look their glossiest and bounciest, which is perfect for this particular style. With that in mind, we recommend getting your hands on the Evalectric Moisturizing shampoo and conditioner combo. Both products are enriched with proteins derived from plants and argan oil, which help pamper the scalp and prevent dehydration. They also help to calm the look of frizz (perfect for curly-haired girls!), and prevent static.
- Next, take your comb and use it to create a neat center parting. Although we want the curls to look loose and free, getting a neat parting will ground this look, making it appear professionally styled!
- With your parting in place, go ahead and start sliding in the clips you’ve selected. At least two and no more than four is perfect! Pro tip: matching clips will look chicer and more sophisticated for events like weddings and work dinners. Clips in clashing colors and materials are more playful, perfect for an edgy hair look to go with a cool off-duty outfit!
- Once your clips are in place, use a little serum to smooth over your curls so they look soft, shiny, and healthy. Hint – the Evalectric Argan Oil and Vitamin E Serum has never let us down!
Short Curls & a Retro Hair Scarf
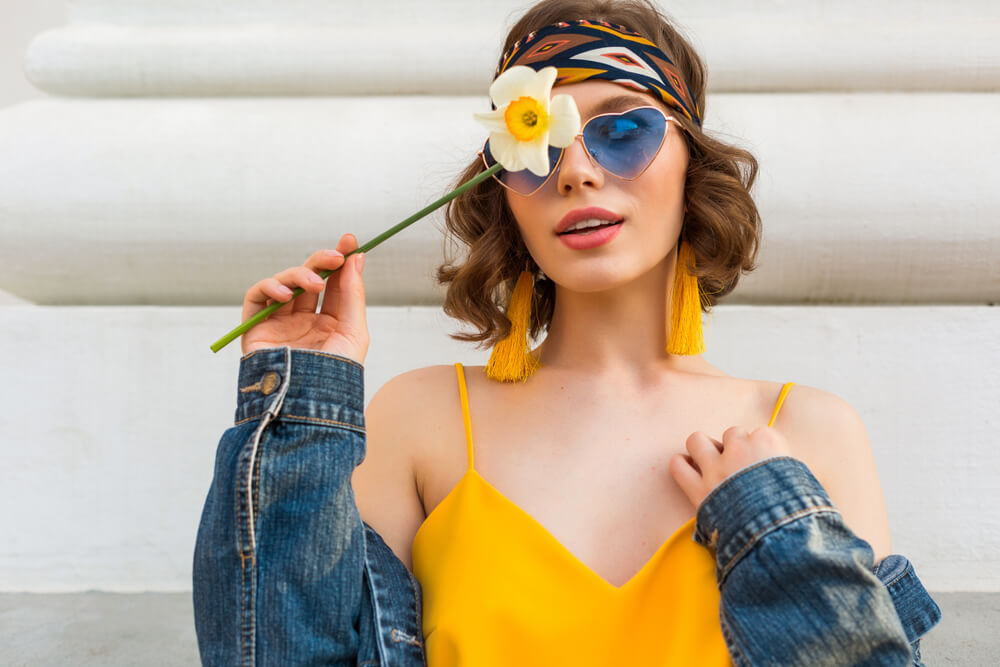
Yes, the 70s are alive and well in 2022 and we can’t wait to celebrate with some psychedelic yet seriously romantic hairstyles over the next twelve months! From bohemian braids and long loose curls to retro accessories and more, this next look is the perfect embodiment of one of our fave style decades gone by!
How to Create Short Curls With a Retro Hair Scarf
- Perhaps your hair is naturally curly or maybe you’ve had help from your heat tools. Either way, this style is super simple to create! To start, decide whether you’re opting for a center parting or a side one. We really think a center parting is more authentic and looks great for the final look but it really does work for both so, you do you!
- Now, the key to this look is to make sure your curls look full and bouncy with plenty of volume at the roots. With this in mind, feel free to brush out your curls to create some volume. Or, use a heat tool to add in a few larger, bouncier curls where you need them!
- Now, flip your head over and tease your roots a little at the crown with a soft bristle brush. If they’re not playing ball, try a spritz of dry shampoo and a quick zhoosh with your fingertips – that should do it!
- For the final step, select a retro-inspired, or genuine vintage, hair scarf that coordinates (or clashes!) with your outfit. Psychedelic prints, vivid colors, and oversized florals are all perfect. Tie the scarf around your hairline and secure it in place at the back by tying a simple knot.
- If this is too much for you, style yours like an Alice band and tie it off beneath the rest of your hair to conceal the knot in your scarf. If you choose the latter, make sure to pull the tail round to the front and drape it over your shoulder for an extra-cute finish!
Gentle Curls With a Braided Crown
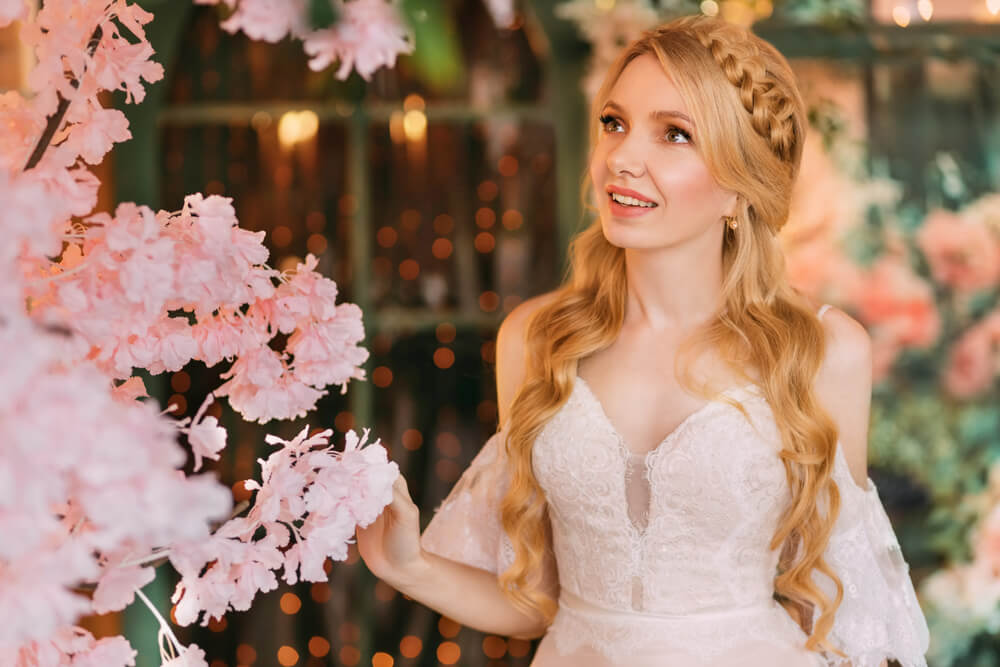
Think this look won’t work on shorter hair?
Not true!
This style will look stunning on longer locks but works beautifully for those with shorter tresses too. So, as long as it’s shoulder-length or longer, you’re all good to go! We adore this hairstyle for brides and bridesmaids. That said, it really can work for any occasion, even weekends and workdays, so don’t be afraid to try it out. Trust us, once you do, you’ll want to wear your curly hair like this every single day!
How to Create Gentle Curls With a Braided Crown
- Begin this look by sectioning off two large yet equal sections from the top third of your hair. Secure the rest away so it can be let loose later on.
- Now, using the three-strand technique, braid each of the two sections all the way to the end and secure each with a clear elastic. Once this is done, wrap the braids around your head like a crown. Tuck in the ends, and secure them in place with bobby pins where needed.
- Now, take the next section down and pull it into a low half up half down style. Secure in place with a trusty clear elastic and let the rest of the curls flow down and around your shoulders. That’s all it takes to create one of the most romantic hairstyles for brides we’ve ever laid eyes on!
Romantic Up-Do Bun
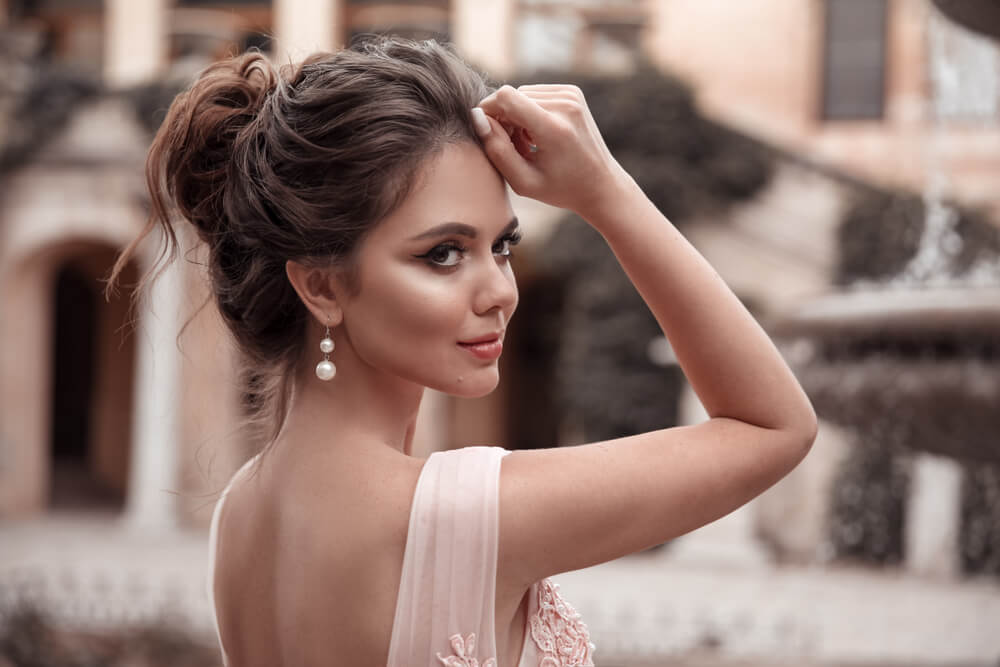
Romantic hairstyles really don’t get more beautiful than this. It’s perfect for ladies with curly hair and looks entirely dreamy. Not to mention, it takes just minutes to create as it is entirely versatile. We would wear this look for dinner dates, long lunches, and even as a wedding guest hair look, as it’s so perfect for celebrating love!
Need a pro tip?
Make sure your hair is at its all-time curliest before you begin!
How to Create a Romantic Up-Do Bun
- Whether your hair is just particularly curly on the day you choose to wear this style or your need a little help from your friendly curling iron, make sure your curls are defined and voluminous before starting this style. It’ll make the final look appear much sleeker and professional.
- Using your fingertips, gently gather your hair as you would if you were putting it into a ponytail. Secure the top half then do the same with the bottom section. Make sure you don’t pull the ponytail too tight. Leave enough of your hair loose at the back to create some all-around volume!
- Once you have both ponytails secured, wrap them around themselves and secure them in place with bobby pins.
- Pull a few pieces loose at the front and be prepared to turn heads!
Which of these romantic hairstyles is your favorite? Which will you try for your bridal look or for your Valentine’s day hairstyle? We’re betting all of the above, and we’re planning to do the same!
To add some new hairstyling products to your beauty arsenal, check out the full range from Evalectric here.


